Not many people would be familiar with the existence of an REST based Azure IOT API. So if you are working with a client or device which does not have an API for Azure IOT, you can still use Azure IOT due to the REST API exposed both for sending messages to Azure IOT Hub and also receiving them.
In detail documentation is provided at :Azure IOT REST API
We will be looking at a simple example of how to send messages and receive them using this API.
Prerequisites :
1. Azure Account (Obviously !!)
2. Either have a controller/MCU (eg. Raspberry PI) could be Low powered but should have internet access and sending data to the Azure IOT Hub an example is shown Creating C# application’s on Raspberry Pi
3. If you do not have the “things” in step 2, you can always download the “azure-iot-sdks” from GITHUB – Azure IOT SDK . This has a Device Explorer inside “Tools” and you can open this in Visual Studio and “Run”. You will be able to see the screen as below
4. Write your own client in any languague (iOS App using Swift / Objective C/ Android App) or Download “POSTMAN” which is a good REST request testing App , you can find POSTMAN
Now lets look at how the Request and Response format for REST based calls are
SEND DEVICE TO CLOUD MESSAGES :
| Method | Request URI |
| POST | https://{IoTHubName}.azure-devices.net/devices/{deviceId}/messages/events?api-version={api-version} |
.
Common Headers
The following information is common to all tasks that you might perform related to IoT Hub:
- Replace {api-version} with “2016-02-03” in the URI.
- Replace {IoTHubName} with the name of your IoT hub.
- Set the Authorization header to a SAS token created as specified in the device section of Using IoT Hub security tokens.
Now the most important step . Before working with any request you would need to generate a SAS (Shared Access Signature) token.
There are couple of easy ways to generate a token,
- Using c# code : Inside “Microsoft.Azure.Devices.Common.Security” you will have “SharedAccessSignatureBuilder” which we will make use of. So you would need to add “Microsoft.Azure.Devices” Nuget packageCode would be as below,
 try
            {
                var builder = new SharedAccessSignatureBuilder()
                {
                    KeyName = keyNameTextBox.Text,
                    Key = keyValueTextBox.Text,
                    Target = targetTextBox.Text,
                    TimeToLive = TimeSpan.FromDays(Convert.ToDouble(numericUpDownTTL.Value))
                }.ToSignature();

                sasRichTextBox.Text = builder + "\r\n";
            }
            catch (Exception ex)
            {
                using (new CenterDialog(this))
                {
                    MessageBox.Show($"Unable to generate SAS. Verify connection strings.\n{ex.Message}", "Error", MessageBoxButtons.OK, MessageBoxIcon.Error);
                }
            }
This would generate a SAS token.
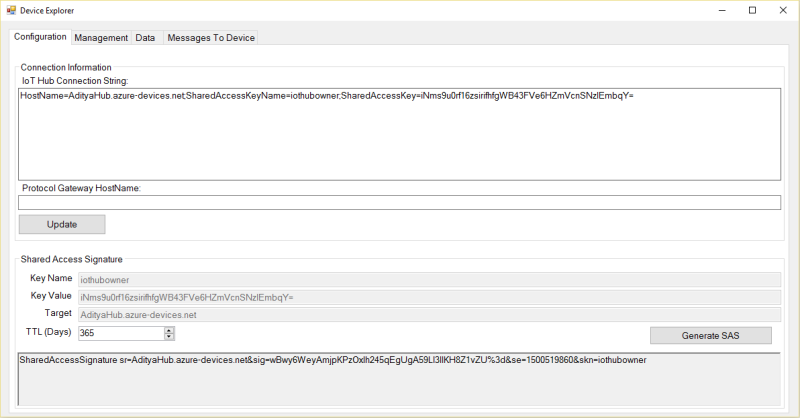
- Using Device Explorer :Copy the IOT Hub Connection string from the Azure Portal. Open Device explorer as explained in Ste 3 of prerequisites, and in the “Configuration” tab input the Connection string and press update as below,
A SAS Token would be generated
Using either of the procedure you will have a SAS token.
Now we will use POSTMAN (lazy to create a Client) to send a POST request to our Azure IOT Hub. For those who are familiar with POSTMAN or any other REST API test client you need to create a header as shown below.
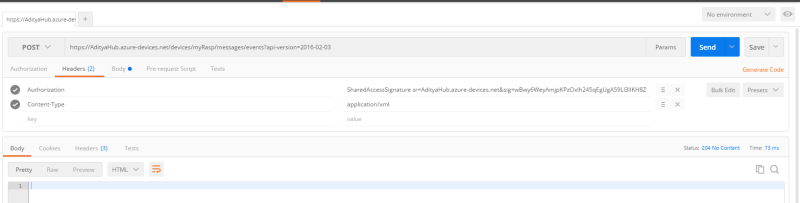
I have added a “Request Header” called “Authorization” and added generated SAS Token as its value. The Content type i have kept as “application/xml” .
The URL i have build using the standard given above which turns out as below
https://AdityaHub.azure-devices.net/devices/myRasp/messages/events?api-version=2016-02-03
You can send in a request using this and we will be able to see the messages either in the Azure Portal / Device Explorer (In “Data” tab click Monitor) as shown below,
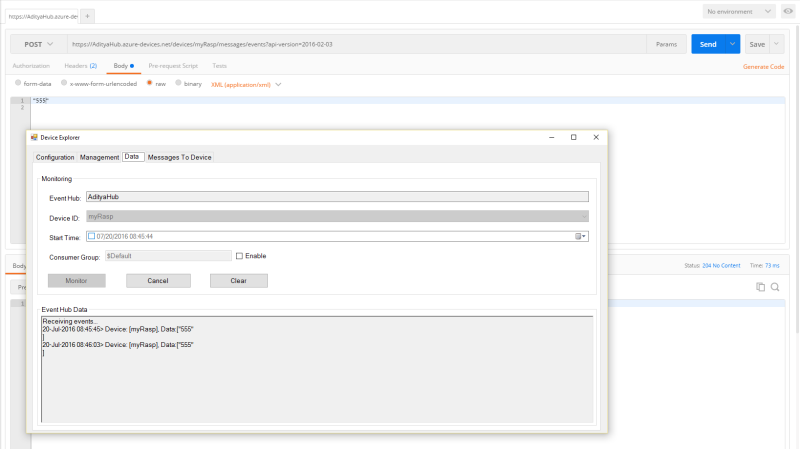
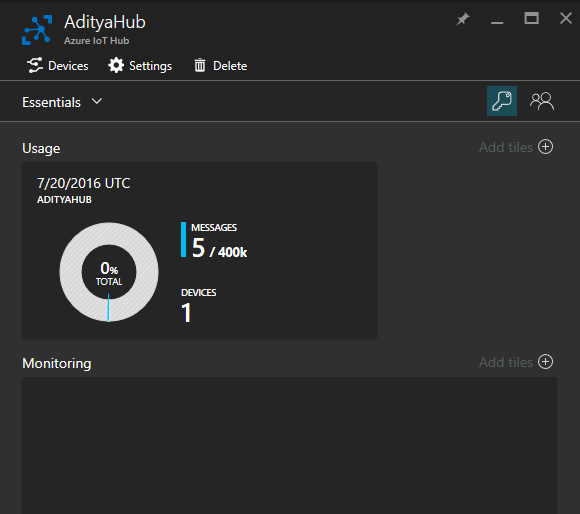
As you would be able to see, i have sent a message called “555” and it is being shown in both Device explorer and Azure Portal.
RECEIVE A CLOUD TO DEVICE MESSAGE :
| Method | Request URI |
| GET | https://{IoTHubName}.azure-devices.net/devices/{deviceId}/messages/devicebound?api-version={api-version} |
In URL is slightly changed from using Events in the POST to using Device Bound in GET Request.
In this also we will need to use a SAS token as shown above. We will change the URL as below for our GET Request.
https://AdityaHub.azure-devices.net/devices/myRasp/messages/devicebound?api-version=2016-02-03
We will use POSTMAN to get a response and Device Explorer to send a message as shown below,
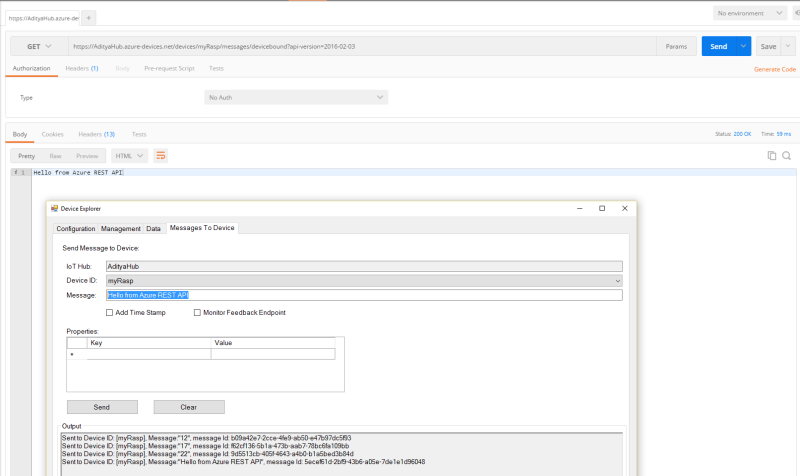
The message sent is now visible as a Response.
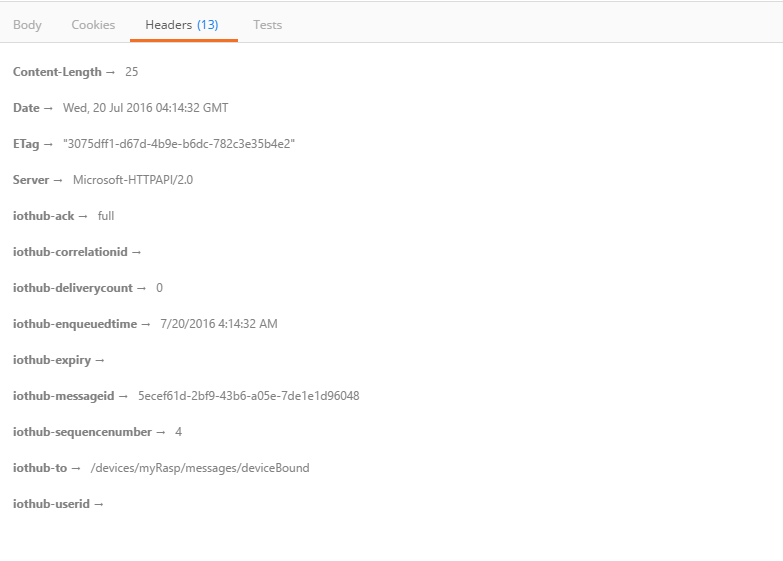
You would also be able to see below messages in the Header,
Thus with this Azure IOT REST API, you would not need to worry on the API availability for your client. Even from your device perspective, if it has a REST Service call capability, you can use that and send a request. You will also be able to Complete , Reject or Abandon a message using the REST services. You can visit the In detail API reference as shared above.
