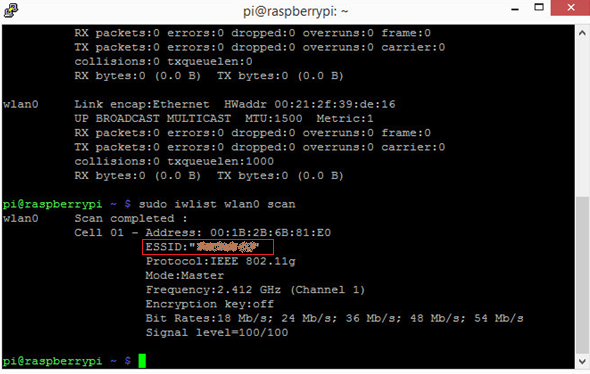
Prerequisites : https://adityaswami89.wordpress.com/2016/03/01/creating-c-applications-on-raspberry-pi/
- Open your Azure management portal (https://portal.azure.com/)
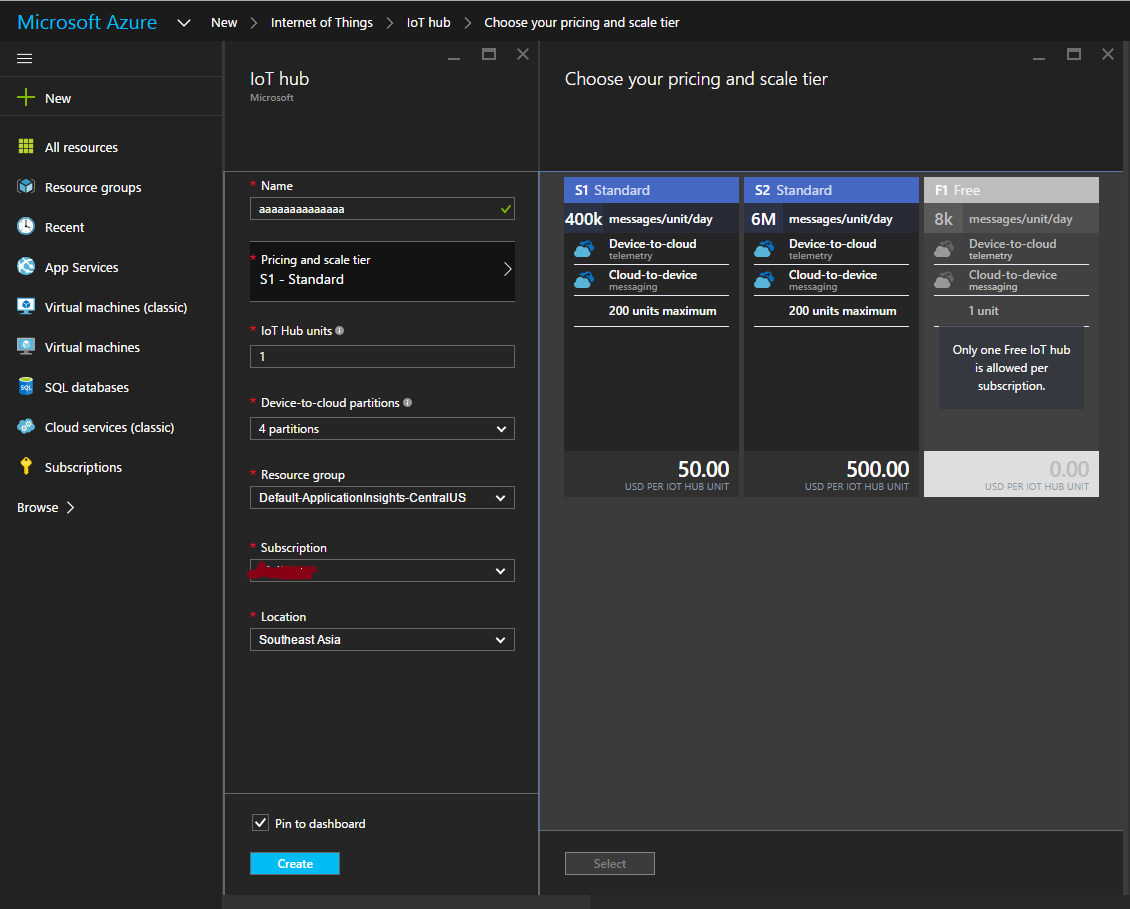
- Click on New -> Internet of Things -> Azure IOT Hub

- Choose the appropriate name, pricing standard you could choose as free if this is your first IOT Application. Azure allows 1 free pricing to be chosen. Click Create.

- The deployment will start and will take couple of minutes to finish.

- After deployment , select the created IOT Hub and make a note of the “Hostname” and “Primary connection string as shown below”

Creating Device ID - Once you’ve set up your instance of IoT Hub, the first thing you need is to create the identity for your device. Every device must have a key that uniquely identifies it to the service. This way the IoT Hub can securely associate the data with the device that sent it.
To create a device ID, use a tool called ‘iothub-explorer’. The tool requires Node.js, so make sure it’s installed on your machine (or get it NodeJS).
Now open the command line prompt and install the iothub-explorer package:npm install -g iothub-explorer@latest
The tool will need the connection string to connect to your instance of the Azure IoT Hub. You can find the connection string in the Azure Portal under the settings tab of your IoT Hub instance: navigate to Settings | Shared access policies | Connection string – primary key.
Now create a new device called ‘myRasp’. Run the tool as follows:iothub-explorer <yourConnectionString> create myRasp
Remember to use your actual connection string in the above command. The tool will create the new device ID and output the primary key for the device, among other things. The primary key is what you’ll use to connect your device to the IoT Hub.

Creating Device Code to send messages to Azure
- Now we will open our Visual Studio and create a Console Application which will act as our device. Choose Framework “4.6”.
- Install “Microsoft.Azure.Devices” and “Microsoft.Azure.Devices.Client” nugget package as shown below

- Now we will write the below code to send a simple message in a while loop (mimicking the behaviour the board does ) as below,
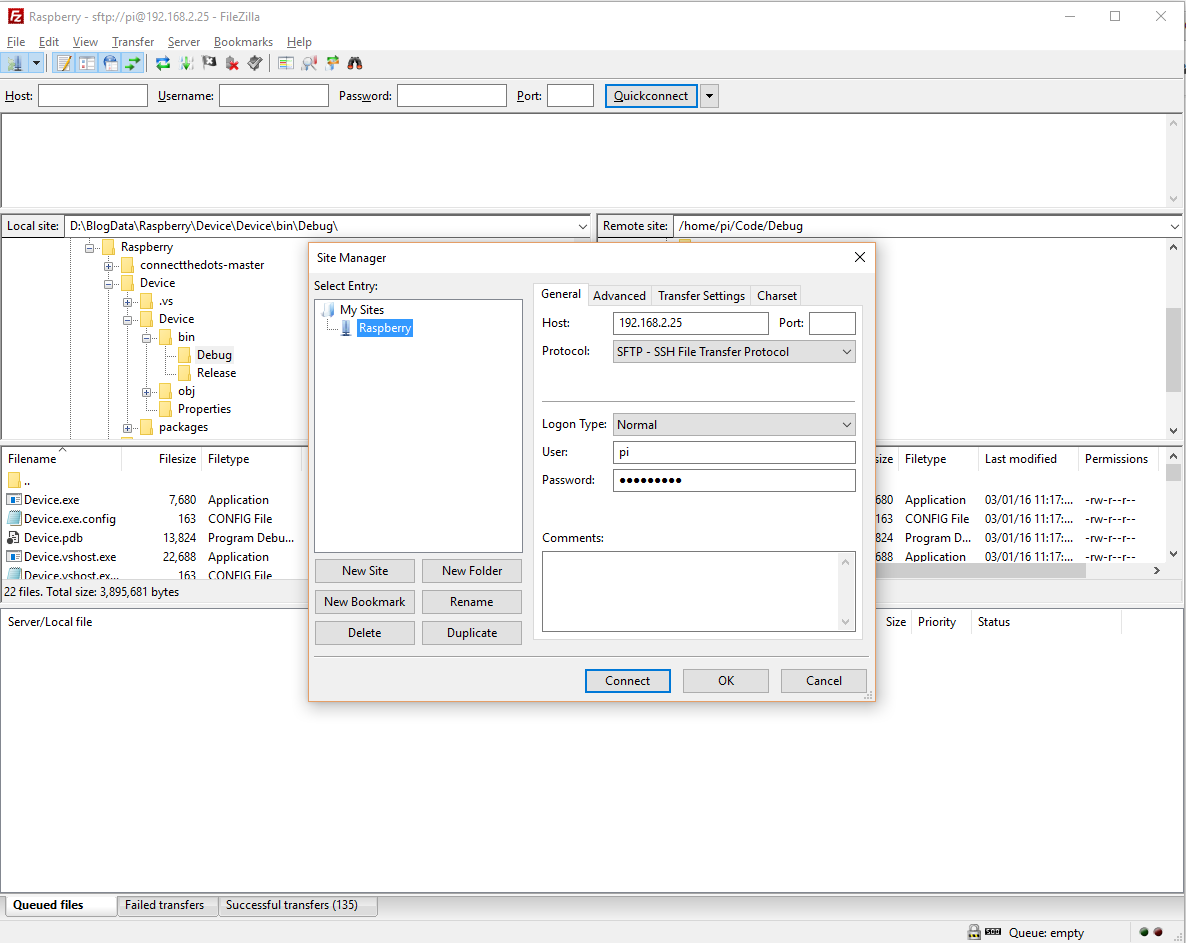
using System; using System.Collections.Generic; using System.Linq; using System.Text; using System.Threading.Tasks; using Microsoft.Azure.Devices; using Microsoft.Azure.Devices.Common.Exceptions; using Newtonsoft.Json; using System.Threading; using Microsoft.Azure.Devices.Client; namespace DeviceApplication { class Program { static RegistryManager registryManager; static string connectionString = "{IOT CONN STRING}"; // Refer Step 5 static DeviceClient deviceClient; static string iotHubUri = "AdityaHub.azure-devices.net"; static string deviceKey = "DevicePrimaryKeyGenerated"; // Refer Step 6 static void Main(string[] args) { if (!string.IsNullOrEmpty(deviceKey)) { deviceClient = DeviceClient.CreateFromConnectionString(connectionString, "myRasp", Microsoft.Azure.Devices.Client.TransportType.Http1); SendDeviceToCloudMessagesAsync(); } Console.ReadLine(); } static async void SendDeviceToCloudMessagesAsync() { var deviceClient = DeviceClient.Create(iotHubUri, Microsoft.Azure.Devices.Client.AuthenticationMethodFactory. CreateAuthenticationWithRegistrySymmetricKey("myRasp", deviceKey), Microsoft.Azure.Devices.Client.TransportType.Http1); while (true) { var str = "Hello, Cloud! from Raspberry" + DateTime.Now.ToString(); var message = new Microsoft.Azure.Devices.Client.Message(Encoding.ASCII.GetBytes(str)); Console.WriteLine(str); await deviceClient.SendEventAsync(message); Thread.Sleep(2000); } } - Now we can copy this application into our Raspberry Pi and run the application. How to copy and run a c# application can be found in my earlier blog here .
Creating Client Application to read message from Azure sent by our Device
- Now we will create an application to receive ingested message’s from Device to Client with Framework 4.6
- Install “WindowsAzure.ServiceBus” Nuget into your solution as below,

- Now we will write the code as below,
using System; using System.Collections.Generic; using System.Linq; using System.Text; using System.Threading.Tasks; using Microsoft.ServiceBus.Messaging; namespace DeviceToClientApplication { class Program { static string connectionString = "HostName=AdityaHub.azure-devices.net;SharedAccessKeyName=iothubowner;SharedAccessKey=iNms9u0rf16zsirifhfgWB43FVe6HZmVcnSNzlEmbqY="; static string iotHubD2cEndpoint = "messages/events"; static EventHubClient eventHubClient; static void Main(string[] args) { Console.WriteLine("Receive messages\n"); eventHubClient = EventHubClient.CreateFromConnectionString(connectionString, iotHubD2cEndpoint); var d2cPartitions = eventHubClient.GetRuntimeInformation().PartitionIds; foreach (string partition in d2cPartitions) { ReceiveMessagesFromDeviceAsync(partition); } Console.ReadLine(); } private async static Task ReceiveMessagesFromDeviceAsync(string partition) { var eventHubReceiver = eventHubClient.GetDefaultConsumerGroup().CreateReceiver(partition, DateTime.UtcNow); while (true) { EventData eventData = await eventHubReceiver.ReceiveAsync(); if (eventData == null) continue; string data = Encoding.ASCII.GetString(eventData.GetBytes()); Console.WriteLine(string.Format("Message received. Partition: {0} Data: '{1}'", partition, data)); } } } } - Now if you run both of these applications, the devices will send messages to the Azure IOT hub and the application to receive ingested messages will display the same. In your Azure portal also you will be able to visualize the number of messages received.
In our next article we will have a look at how to store these kind of data into Azure NoSQL databases.


Find below the images of the same. Apologies for the poor resolution.